|
|
Post by trooper11040 on Nov 18, 2013 20:57:58 GMT -5
Does anyone have any lights (lamps) on their coin doors reject buttons? If you do, post some pics....I am about to mod my super chexx to add lights to the reject buttons just for the old arcade look!
|
|
|
|
Post by trooper11040 on Nov 30, 2013 0:58:43 GMT -5
ok...well I finished the light up coin doors...here is the finished pictures...I think it makes the door look awesome...and i have it wired so the lights come on with the game... 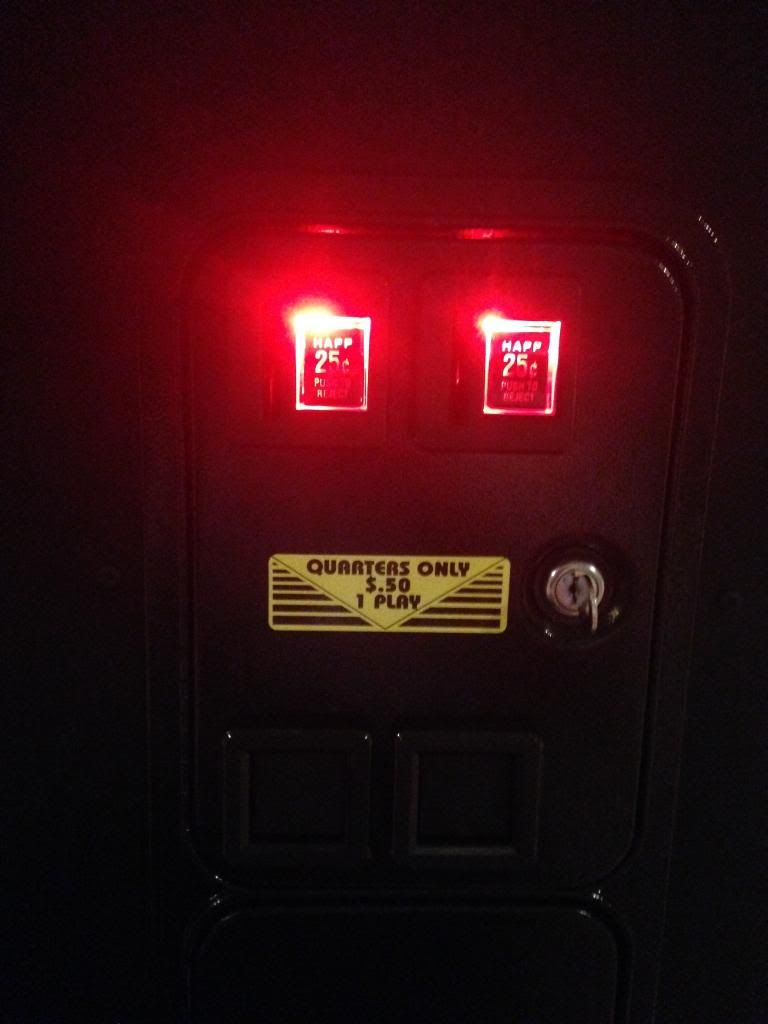 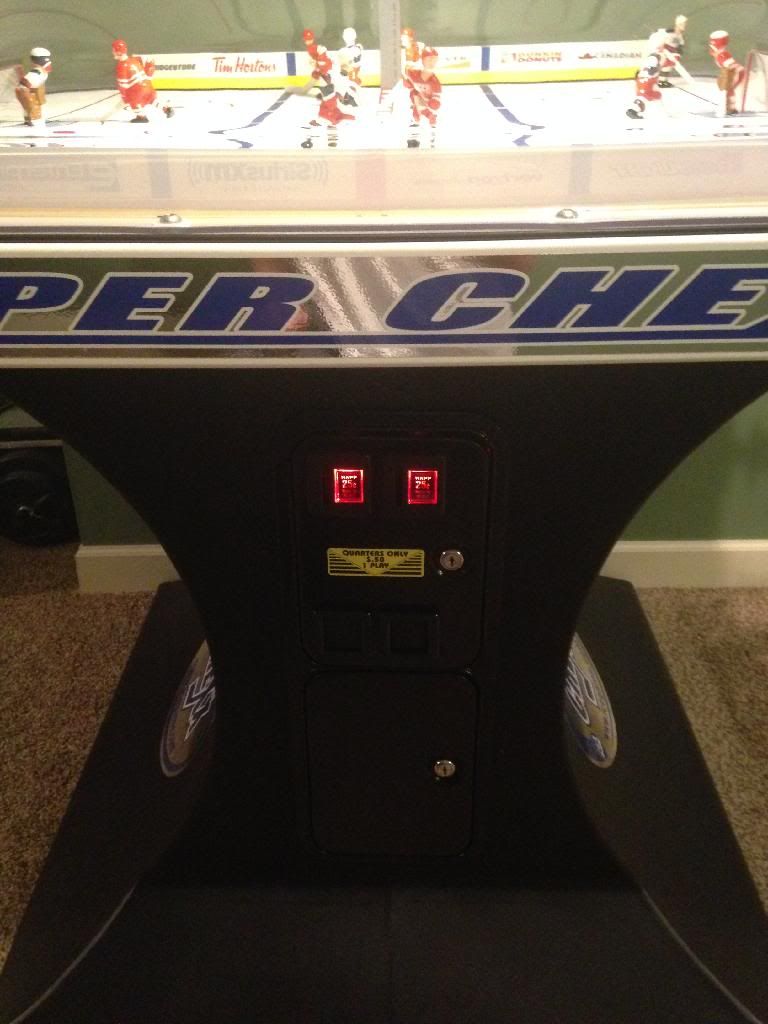 |
|
|
|
Post by Admin on Nov 30, 2013 23:36:09 GMT -5
that is definitely awesome, could you take of pic of what you did to make it like that?
|
|
|
|
Post by trooper11040 on Dec 1, 2013 13:56:37 GMT -5
sure thing...when i get home from work, ill take some pics and instructions on obtaining what you need to make it work...
|
|
|
|
Post by trooper11040 on Dec 1, 2013 23:45:02 GMT -5
Ok so here is the basic scoop on wiring your coin door lights... For starters, I changed the color of the reject button from the yellow that comes with a new super chexx, to a red reject button. The buttons are made by Suzo-Happ, and can be found pretty easily on ebay, or other places on the internet that sell arcade parts. They are an easy change, and anyone with a screwdriver and some basic knowledge can get the old ones out, and put a new one in...I think the red reject button really brings back that arcade feel from in the 80's and 90's. The 2nd step, is finding the white clip on lamp holders, again made by Suzo-Happ. Best place to get them, is again eBay...Here is the seller I used...sells them very cheap-- www.ebay.com/itm/160637659899?ssPageName=STRK:MEWNX:IT&_trksid=p3984.m1439.l2649The next thing is finding the kind of bulb you want to light the game. I decided to go with a 6 bulb red LED, that I bought from Superbrightleds.com. The bulb is a 194 size wedge type bulb, that is plug and play with the wedge lamp holder listed above. You can also use a regular 161 size 14v bulb if you so decide, or any automotive T3-1/4 12v lamp. The LED's though are low voltage, and last forever. The LED I used is here: www.superbrightleds.com/moreinfo/miniature-wedge-base/194-led-bulb-6-led-wedge-base/200/879/The next thing you will need to know is basic soldering skills. You need to also find a computer cable that has 2 MOLEX style "Male" ends on it. I went to radio shack and bought this: www.radioshack.com/product/index.jsp?productId=3780246I cut off the black part of the cable, and used the wires with the male end on it from the white harness. You will need to first remove the male connector from the harness...use a jewelers screwdriver, and push in the small little tabs (There is 2 of them) Once the tabs are in, the male end will come right out of the harness. You will also need to take something with a point, and make the tip of the male end a bit wider...as the connector on the super chexx uses a bit bigger female end. No big deal...if you can find the right size, then you won't need to do this, but that radio shack cable is a smaller gauge wire. Once you have the male end out of the harness, you are going to solder it to a longer black and red wire. Thats going to be your lead to your lamps...simple enough. (NOTE: My wires are green but its because I ran out of black wire...I used 18 gauge wire from Radio Shack) Your going to wire the lamps in parallel. See photo...tin all the tips of the lamp holders, then solder your black and red wires to it. On the harness, your going to use the inner harness...The harness is labeled J2, or Cabinet. Pins 3 and 4 are empty, but are rated for 12v. Pin 3 is your hot (Red wire), Pin 4 is your ground (Black Wire) Take those molex male ends, and put them into the existing J2 harness on the super chexx. Plug in the harness, and viola, your lights should work...I hope this makes sense...if you have any questions, PM me...I AM NOT RESPONSIBLE FOR ANYONE WHO SCREWS UP THEIR BOARD OR GAME!!! 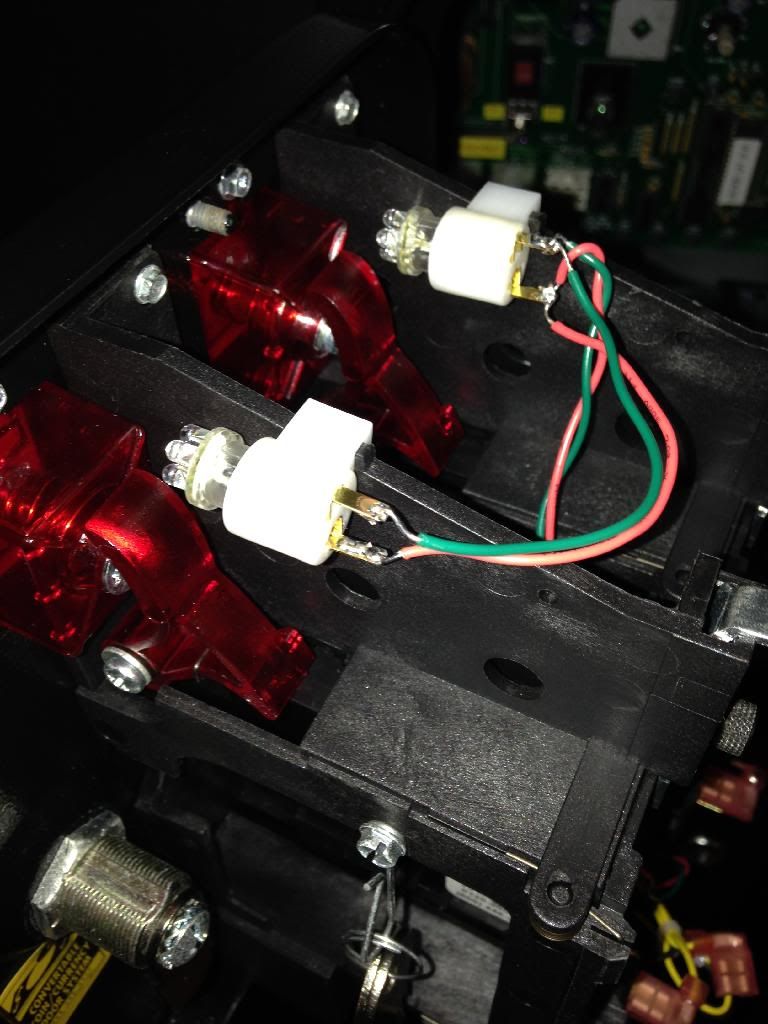 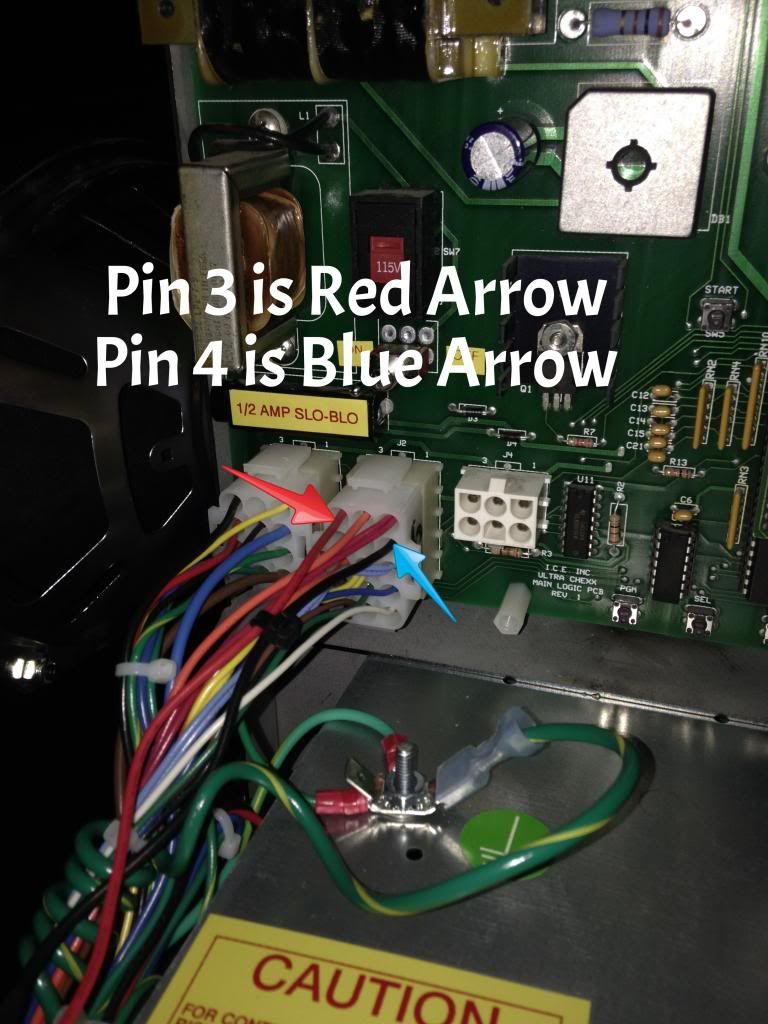 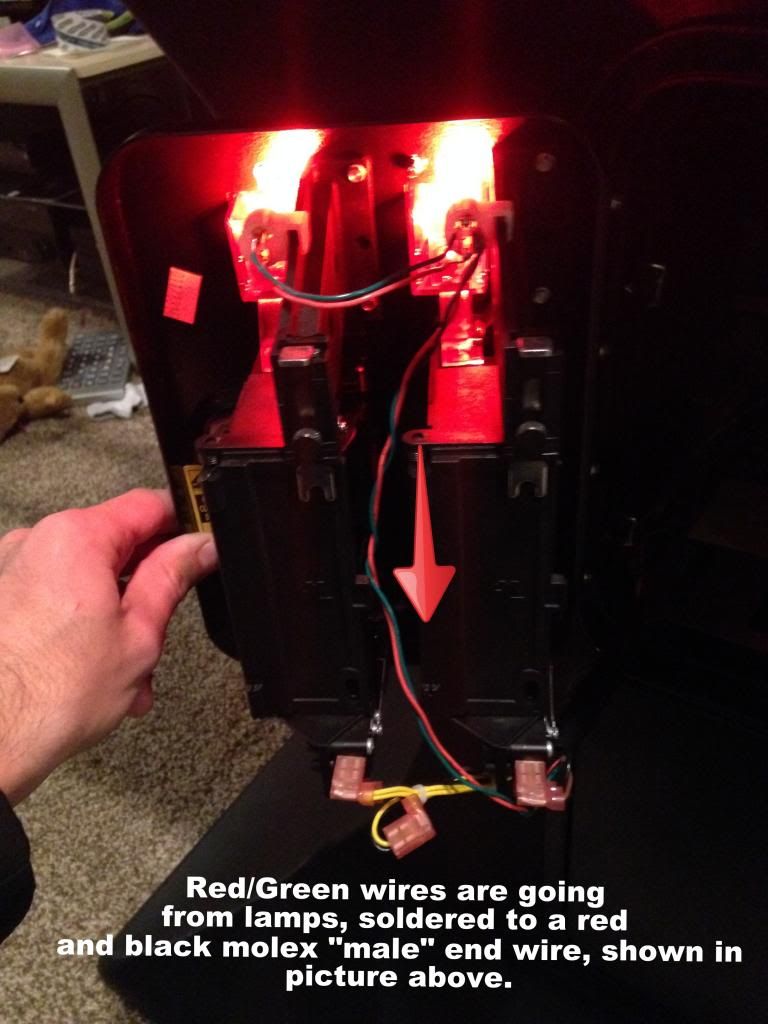 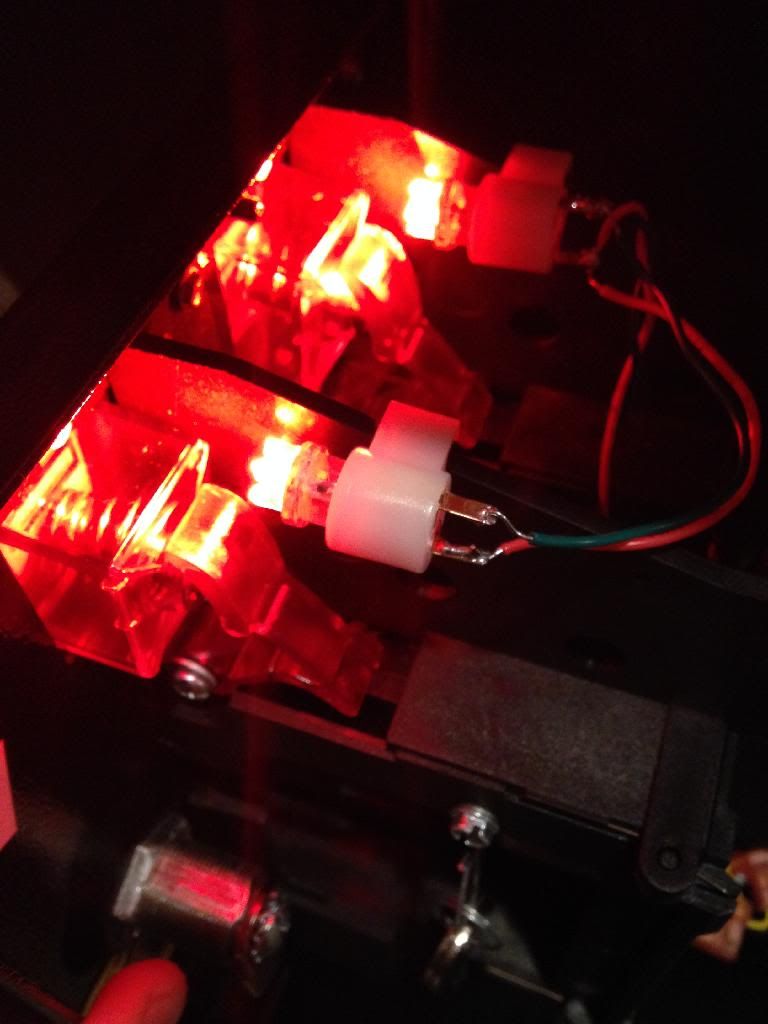 |
|
|
|
Post by DTP on Apr 6, 2015 2:07:20 GMT -5
Nice
|
|


